
In this day and age of instant gratification, usability testing is often relegated to crisis situations when a website or an app does not perform to expectations. However, ask any conversion optimization expert and they’ll tell you that usability testing is not a complicated afterthought. It’s a necessary precursor to the launch of every successful online property.
While it is imperative that you perform usability tests before launch, existing websites and apps can also stand to gain big by discovering usability loopholes and efficiency sinks.
Here’s a step by step walk-through to build your very own usability test along with a snapshot of the tools that will help your test succeed. Before we begin though, here is a small but important disclaimer. This article mentions tools that I have personally used to conduct usability tests. May I clearly state that this should not be regarded as a promotional endeavor and none of the software development companies behind these tools have been involved or contacted for the selection process for this article. Simply put, these are just some great tools that I use and would like to share with you.
That being said, the tools mentioned in this article are not the only ones that are available. In fact, we have previously published a comprehensive list of user experience tools that you can use, and, because we have always maintained that testing need not be an expensive task, we have also published a list of usability testing tools when on a budget. Now back to the article …
Step 1: Define Testing Objectives and Create a Project
Why do you need to do a usability test? What are you trying to achieve? Is there a specific part of your website or app that needs scrutiny? Are you trying to solve a specific user problem? Which tasks need to be tested for their interaction experience? All of these are legitimate questions that need answering before you can plunge into a usability testing session.
Once you know the objectives of the test, you need a plan of what you’re going to do to implement it, which teams are going to be involved, what aspects of your website or app need improvements before testing is carried out and so on.
I rely on a multi-faceted collaborative (and free!) project management tool, Bitrix24. Bitrix24 allows you to do each of the tasks listed above with fluency and a whole lot more.
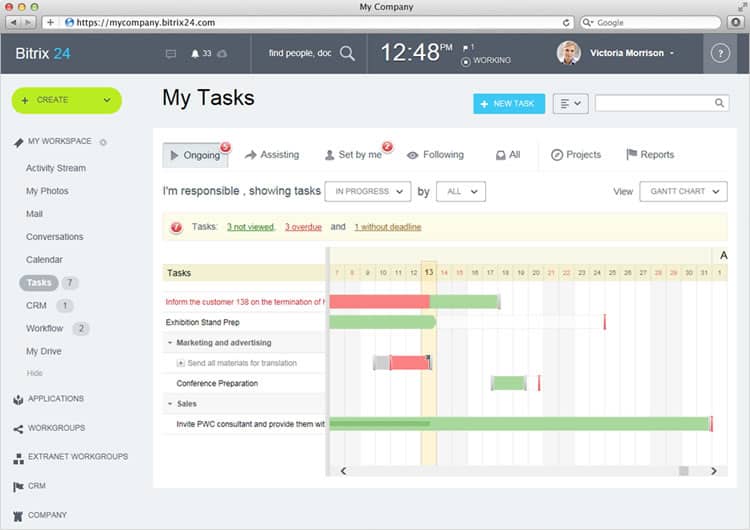
From collaborating with your entire team on building a testing plan, to creating a step by step Gantt chart for the test process, sharing data between your testing team members, creating checklists of things to do, assigning responsibility among team members to storing data and files related to your usability tests; Bitrix24 covers the entire gamut of project management and collaboration needs.
What I love about this tool is that it offers a host of applications beyond usability testing needs. There’s a dedicated social network for your team and company. Bitrix’s instant messaging and video chat feature rivals the best in the business. With over 35 dedicated tools rolled into one versatile platform, Bitrix is a tempting free tool for startups looking for an efficient in-house communications and productivity platform.
Step 2: Build a Test Prototype / Wireframe
Now that you have narrowed down what your testing goals are and defined the path to achieving those goals, you need to create a prototype or wireframe of your app / website so users can test it out. Fidelity is key for choosing whether to prototype or wireframe. Now, many of you may wonder why you need to invest more resources into building a prototype, when users can test the final version of your website directly.
The reason is simple. By testing a prototype instead of the final product, you’re pre-empting any major design flaws or usability issues that might crop up when it is too late or too expensive to undo those errors. A prototype is quicker and cheaper to build, offers developers the option of exploring multiple variants of the final product at a fraction of the cost of the final version and provides a platform to iterate and create a finished, final product.
Justinmind is a simple and extremely flexible (did I mention free?) wire-framing tool that you can use to build rich prototypes with a simple drag and drop interface. Unlike many others on the market, this tool allows you to build clickable prototypes that can be used in a real world usability test.
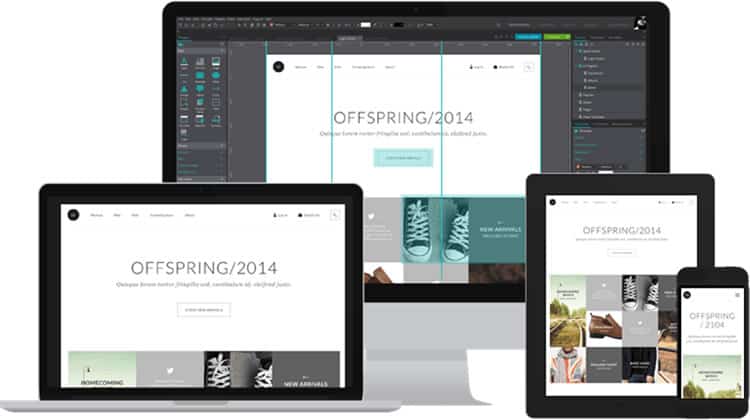
Justinmind lets you build an unlimited number of prototypes and variants for each use case scenario, while allowing you to embed HTML code, widgets, images and videos into your prototype as you go along. I especially fancy their extensive library of readymade widgets, templates, buttons and forms that you can incorporate into your prototypes with just a click.
Step 3: Recruit Test Participants and Conduct Tests
With a testing plan and a working prototype, you are already halfway there. Since the proof of the pudding lies in the eating, you now need to find the right test participants to test your prototype and carry out your tests as impartially as possible.
How you find test participants depends on the type of product you’re handling and the size of audience your specific test needs to be statistically significant. The best kind of test participant is one who is a part of the actual target audience for your product. There are various ways on how you can recruit participants for usability testing. You can recruit them from research company panels, from among real visitors to your website, paid participants whose profile matches that of your target audience and so on. Once you identify the test participants, you can then invite them via email.
I prefer using UserTesting for this step. For me it is hands down one of the easiest and most efficient means of recruiting the ideal participants for your test as well as for administering the test efficiently. This usability testing tool allows you to pick your desired test participants based on age, location, sex, familiarity with your product, income levels, online habits, and more.
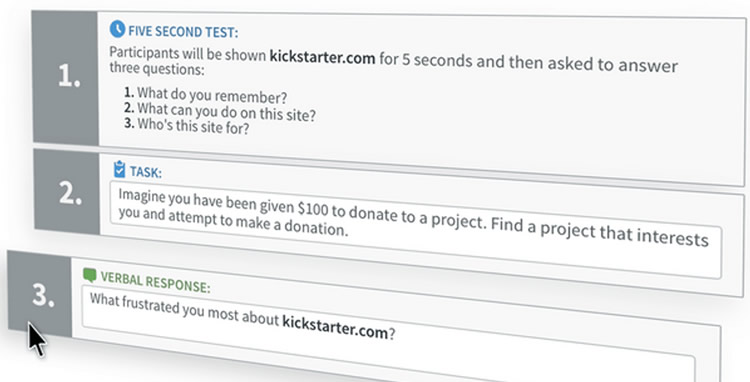
You can design your own tests using your prototypes and administer them to the pre-selected audience via this tool. UserTesting provides you with videos of users interacting with your prototype, comments they make as they use it, stumbling blocks faced by them, and net promoter scores for your prototype. All of this comes within an hour of launching your test and at an attractive price of $39 per video.
Step 4: Collect Data and Analyze Results
While most testing platforms will offer you a summary of each test participant’s experience with your prototype, detailed questions regarding the product, difficulties they faced, suggestions on improvements etc. cannot be obtained without directly interacting with the participants.
Invest in post-test session questionnaires with your test participants and probe them to know more about their experience with your product or prototype.
In tests that are administered face to face, you can rely on verbal questions and get your answers on the spot. However, a large number of usability tests are remotely administered and testers are not in direct contact with the business owners. In such a scenario, it is necessary to create a quick, but incisive questionnaire (or use an established post-test session questionnaire such as the System Usability Scale) that reveals the critical aspects of the test that are not revealed by the testing tool and test video.
My tool of choice for this final step is SurveyGizmo. This robust survey tool allows you to build your own surveys from scratch or pick from their vast library of sample survey templates. You have the option of creating your own rating scales, skip logic, personalized survey design and branding and the like.
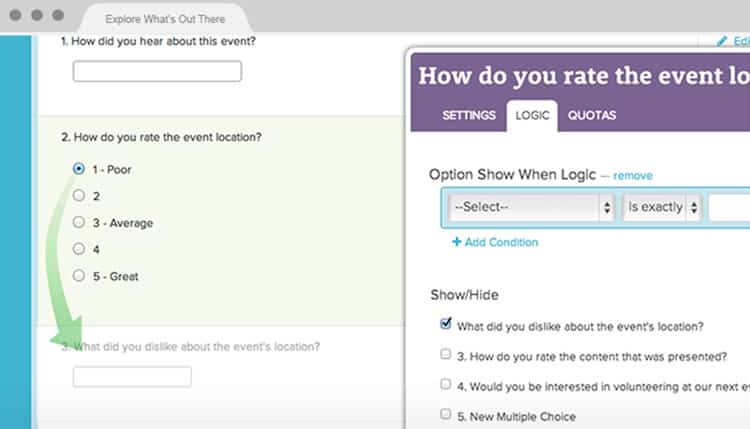
SurveyGizmo collects responses that are available to you in real time with detailed analysis, charts and reporting features. Reports can be exported out of the tool in CSV, PDF, PowerPoint or SPSS and examined further to uncover insights about your usability tests and problem areas that need your attention.
Parting Thought
Usability testing helps you fix problems much before they manifest in the real world. It reduces both the development as well as the support costs by assessing the real usage of your website or application using real users (or a representative sample). As can be seen in this article, a number of tools are readily available for free or at a minimal cost in order to facilitate the testing process. Now that’s a practice worth the time, don’t you think?
Source: Usability Geek
Author: Tracy Vides